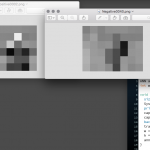
This is the first trial of the Machine Learning module, artificial neural network in OpenCV with Processing. I used the same OpenCV 3.1.0 Java built files. The program took the live stream video (PImage) from webcam and down-sampled to a grid of just 8 x 6 pixels of greyscale. It started by default in the training mode such that I could click on the left hand side of the screen for an image without a hat and on the right hand side for an image of myself wearing a hat. By pressing the SPACE key, it switched to the predict mode where by clicking the video would send the image to the neural network to see if I was wearing a hat or not. I used around 20 images for positive response and 20 images for negative response.
Here are the source codes.
The main program
import processing.video.*;

Capture cap;
boolean training;
ANN ann;
int w, h;

void setup() {
  size(640, 480);
  System.loadLibrary(Core.NATIVE_LIBRARY_NAME);
  println(Core.VERSION);
  cap = new Capture(this, width, height);
  cap.start();
  background(0);
  training = true;
  w = 8;
  h = 6;
  ann = new ANN(w*h);
}

void draw() {
  image(cap, 0, 0);
}

void captureEvent(Capture c) {
  c.read();
}

void mousePressed() {
  PImage img = new PImage(w, h, ARGB);
  img.copy(cap, 0, 0, width, height, 0, 0, w, h);
  img.updatePixels();
  img.filter(GRAY);
  String fName = "";
  float [] grey = getGrey(img);
  if (training) {
    float label = 0.0;
    if (mouseX < width/2) {
      label = 0.0;
    } else {
      label = 1.0;
    }
    ann.addData(grey, label);
    fName = (label == 0.0) ? "Negative" : "Positive";
    fName += nf(ann.getCount(), 4) + ".png";
    img.save(dataPath("") + "/" + fName);
  } else {
    float val = ann.predict(grey);
    float [] res = ann.getResult();
    val = res[0];
    float diff0 = abs(val);
    float diff1 = abs(val - 1);
    if (diff0 < diff1) {
      println("Without hat");
    } else {
      println("With hat");
    }
  }
}

float [] getGrey(PImage m) {
  float [] g = new float[w*h];
  if (m.width != w || m.height != h)
    return g;
  for (int i=0; i<m.pixels.length; i++) {
    color c = m.pixels[i];
    g[i] = red(c) / 256.0;
  }
  return g;
}

void keyPressed() {
  if (keyCode == 32) {
    training = !training;
    if (!training)
      ann.train();
  }
  println("Training status is " + training);
} |
import processing.video.*;
Capture cap;
boolean training;
ANN ann;
int w, h;
void setup() {
size(640, 480);
System.loadLibrary(Core.NATIVE_LIBRARY_NAME);
println(Core.VERSION);
cap = new Capture(this, width, height);
cap.start();
background(0);
training = true;
w = 8;
h = 6;
ann = new ANN(w*h);
}
void draw() {
image(cap, 0, 0);
}
void captureEvent(Capture c) {
c.read();
}
void mousePressed() {
PImage img = new PImage(w, h, ARGB);
img.copy(cap, 0, 0, width, height, 0, 0, w, h);
img.updatePixels();
img.filter(GRAY);
String fName = "";
float [] grey = getGrey(img);
if (training) {
float label = 0.0;
if (mouseX < width/2) {
label = 0.0;
} else {
label = 1.0;
}
ann.addData(grey, label);
fName = (label == 0.0) ? "Negative" : "Positive";
fName += nf(ann.getCount(), 4) + ".png";
img.save(dataPath("") + "/" + fName);
} else {
float val = ann.predict(grey);
float [] res = ann.getResult();
val = res[0];
float diff0 = abs(val);
float diff1 = abs(val - 1);
if (diff0 < diff1) {
println("Without hat");
} else {
println("With hat");
}
}
}
float [] getGrey(PImage m) {
float [] g = new float[w*h];
if (m.width != w || m.height != h)
return g;
for (int i=0; i<m.pixels.length; i++) {
color c = m.pixels[i];
g[i] = red(c) / 256.0;
}
return g;
}
void keyPressed() {
if (keyCode == 32) {
training = !training;
if (!training)
ann.train();
}
println("Training status is " + training);
}
The Artificial Neural Network class
import org.opencv.core.Core;
import org.opencv.core.CvType;
import org.opencv.core.MatOfInt;
import org.opencv.core.MatOfFloat;
import org.opencv.ml.ANN_MLP;

public class ANN {
  final int MAX_DATA = 1000;
  ANN_MLP mlp;
  int input;
  int output;
  ArrayList<float []>train;
  ArrayList<Float>label;
  MatOfFloat result;
  String model;

  public ANN(int i) {
    input = i;
    output = 1;
    mlp = ANN_MLP.create();
    MatOfInt m1 = new MatOfInt(input, input/2, output);
    mlp.setLayerSizes(m1);
    mlp.setActivationFunction(ANN_MLP.SIGMOID_SYM);
    mlp.setTrainMethod(ANN_MLP.RPROP);
    result = new MatOfFloat();
    train = new ArrayList<float[]>();
    label = new ArrayList<Float>();
    model = dataPath("trainModel.xml");
  }

  void addData(float [] t, float l) {
    if (t.length != input)
      return;
    if (train.size() >= MAX_DATA)
      return;
    train.add(t);
    label.add(l);
  }

  int getCount() {
    return train.size();
  }

  void train() {
    float [][] tr = new float[train.size()][input];
    for (int i=0; i<train.size(); i++) {
      for (int j=0; j<train.get(i).length; j++) {
        tr[i][j] = train.get(i)[j];
      }
    }
    MatOfFloat response = new MatOfFloat();
    response.fromList(label);
    float [] trf = flatten(tr);
    Mat trainData = new Mat(train.size(), input, CvType.CV_32FC1);
    trainData.put(0, 0, trf);
    mlp.train(trainData, Ml.ROW_SAMPLE, response);
    trainData.release();
    response.release();
    train.clear();
    label.clear();
  }

  float predict(float [] i) {
    if (i.length != input)
      return -1;
    Mat test = new Mat(1, input, CvType.CV_32FC1);
    test.put(0, 0, i);
    float val = mlp.predict(test, result, 0);
    return val;
  }

  float [] getResult() {
    float [] r = result.toArray();
    return r;
  }

  float [] flatten(float [][] a) {
    if (a.length == 0)
      return new float[]{};
    int rCnt = a.length;
    int cCnt = a[0].length;
    float [] res = new float[rCnt*cCnt];
    int idx = 0;
    for (int r=0; r<rCnt; r++) {
      for (int c=0; c<cCnt; c++) {
        res[idx] = a[r][c];
        idx++;
      }
    }
    return res;
  }
} |
import org.opencv.core.Core;
import org.opencv.core.CvType;
import org.opencv.core.MatOfInt;
import org.opencv.core.MatOfFloat;
import org.opencv.ml.ANN_MLP;
public class ANN {
final int MAX_DATA = 1000;
ANN_MLP mlp;
int input;
int output;
ArrayList<float []>train;
ArrayList<Float>label;
MatOfFloat result;
String model;
public ANN(int i) {
input = i;
output = 1;
mlp = ANN_MLP.create();
MatOfInt m1 = new MatOfInt(input, input/2, output);
mlp.setLayerSizes(m1);
mlp.setActivationFunction(ANN_MLP.SIGMOID_SYM);
mlp.setTrainMethod(ANN_MLP.RPROP);
result = new MatOfFloat();
train = new ArrayList<float[]>();
label = new ArrayList<Float>();
model = dataPath("trainModel.xml");
}
void addData(float [] t, float l) {
if (t.length != input)
return;
if (train.size() >= MAX_DATA)
return;
train.add(t);
label.add(l);
}
int getCount() {
return train.size();
}
void train() {
float [][] tr = new float[train.size()][input];
for (int i=0; i<train.size(); i++) {
for (int j=0; j<train.get(i).length; j++) {
tr[i][j] = train.get(i)[j];
}
}
MatOfFloat response = new MatOfFloat();
response.fromList(label);
float [] trf = flatten(tr);
Mat trainData = new Mat(train.size(), input, CvType.CV_32FC1);
trainData.put(0, 0, trf);
mlp.train(trainData, Ml.ROW_SAMPLE, response);
trainData.release();
response.release();
train.clear();
label.clear();
}
float predict(float [] i) {
if (i.length != input)
return -1;
Mat test = new Mat(1, input, CvType.CV_32FC1);
test.put(0, 0, i);
float val = mlp.predict(test, result, 0);
return val;
}
float [] getResult() {
float [] r = result.toArray();
return r;
}
float [] flatten(float [][] a) {
if (a.length == 0)
return new float[]{};
int rCnt = a.length;
int cCnt = a[0].length;
float [] res = new float[rCnt*cCnt];
int idx = 0;
for (int r=0; r<rCnt; r++) {
for (int c=0; c<cCnt; c++) {
res[idx] = a[r][c];
idx++;
}
}
return res;
}
}
