MediaPipe in TouchDesigner 1

It is the part 1 of the tutorials introducing the use of the Google MediaPipe machine learning library in TouchDesigner. It will assume basic knowledge of TouchDesigner and fundamental coding skill in Python. The platform I am working on is a MacBook Pro running the OSX 11. TouchDesigner has its integrated Python programming environment. At the moment of writing, the Python version is 3.7. It also comes with a number of pre-installed external libraries, such as NumPy and OpenCV.

The first installation will be the Python programming language environment. I would recommend installing the official 3.7 version from the Python download website. Expand the dmg file and run the installer to install the proper Python version to the computer.

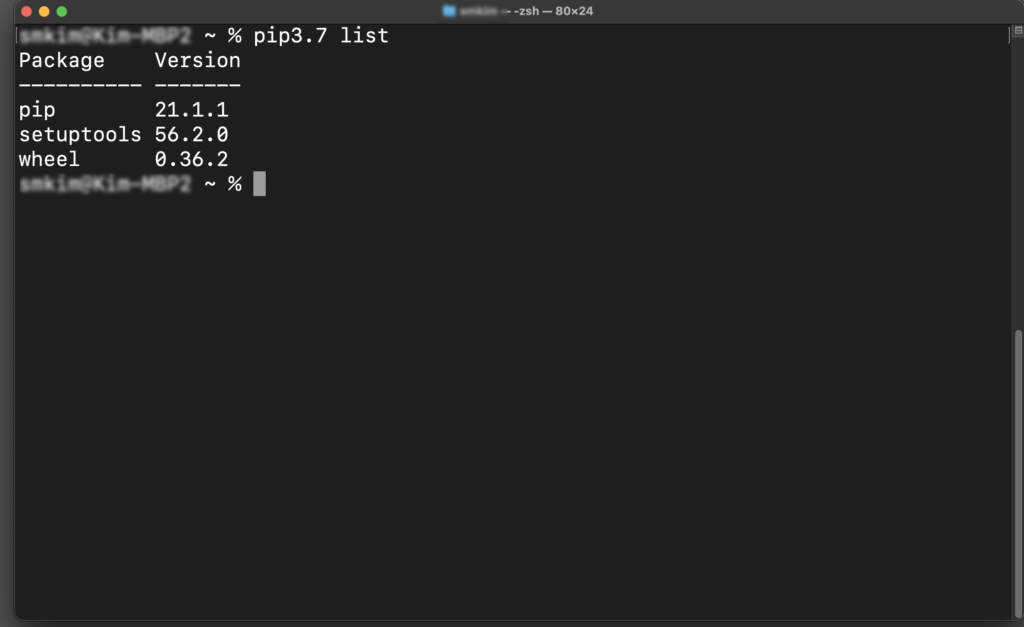
After we have the Python installed, the next step will be external libraries we would like to use in the Python environment. The target one is MediaPipe. We are going to use the pip command from the OSX Terminal. For general usage of the OSX Terminal, we can refer to the Terminal User Guide from Apple. For those who may have multiple Python versions installed, we can use the specific command pip3.7 to install the external libraries to make sure they are compatible with the TouchDesigner. For a brand new Python environment, the libraries it come with are:

  • pip
  • setuptools
  • wheel
pip list command

Pip is one of the package management system we can use in the Python environment. To install extra library such as the MediaPipe, we can type the following from the Terminal.

pip3.7 install --upgrade --user mediapipe
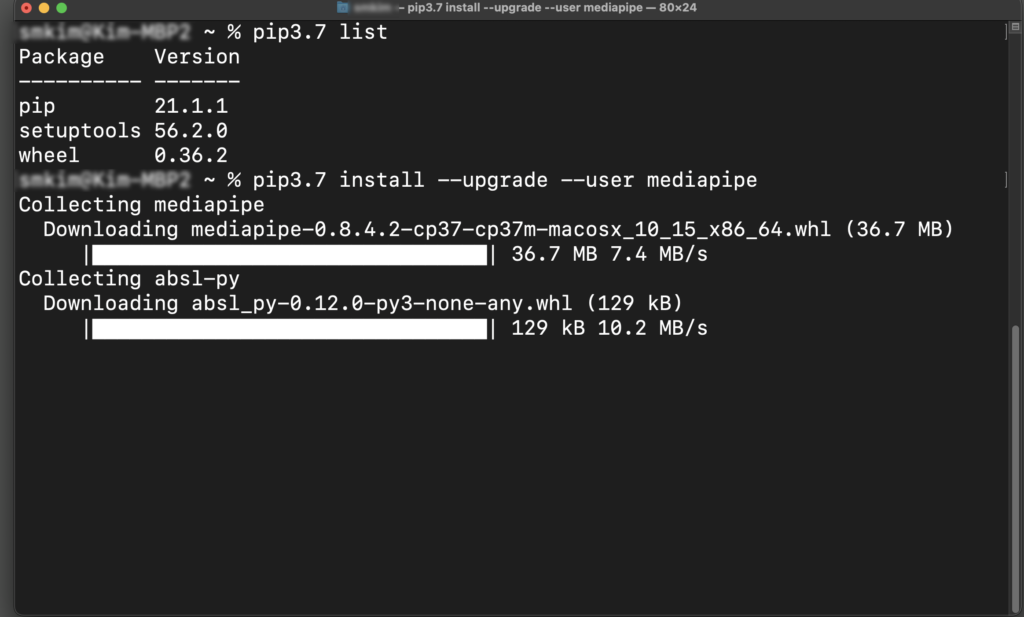
Install MediaPipe with pip

The following screenshot listed all the libraries we have after the installation.
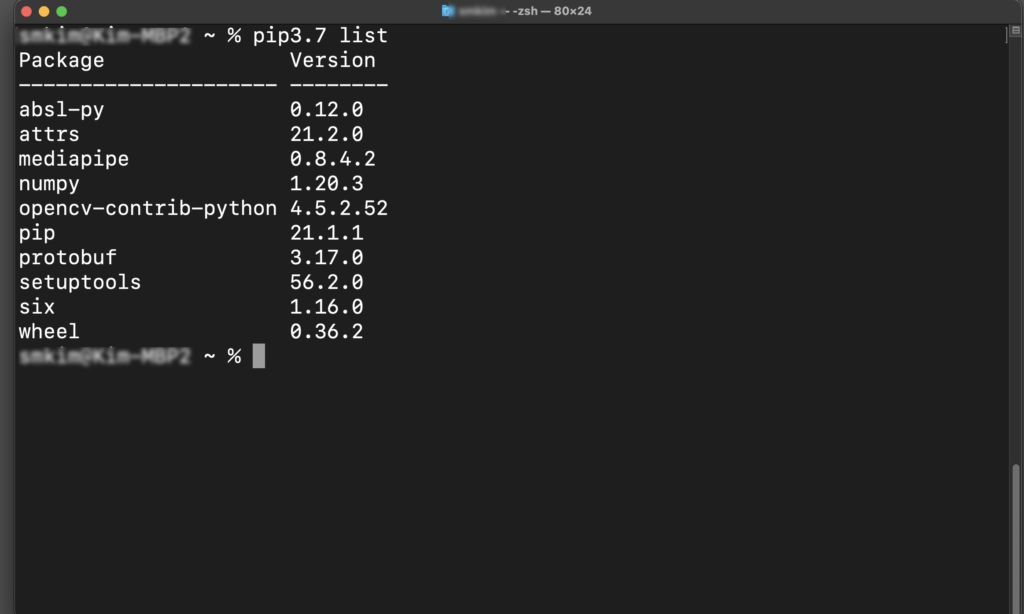
The list of libraries after installing MediaPipe

After we ready the Python and the MediaPipe library, we can go back to TouchDesigner to enable it to link to the external libraries that we have installed outside it.

From the TouchDesigner pull down menu, choose Dialogs – Textport and DATs.
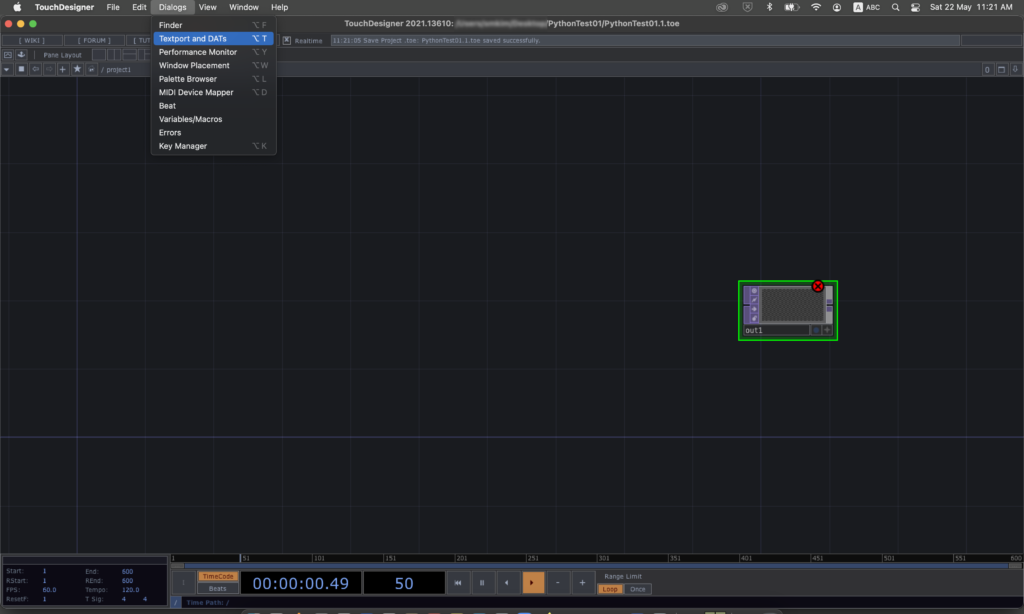
Textport and DATs

Inside the Textport, we can try to import OpenCV and list its current version.
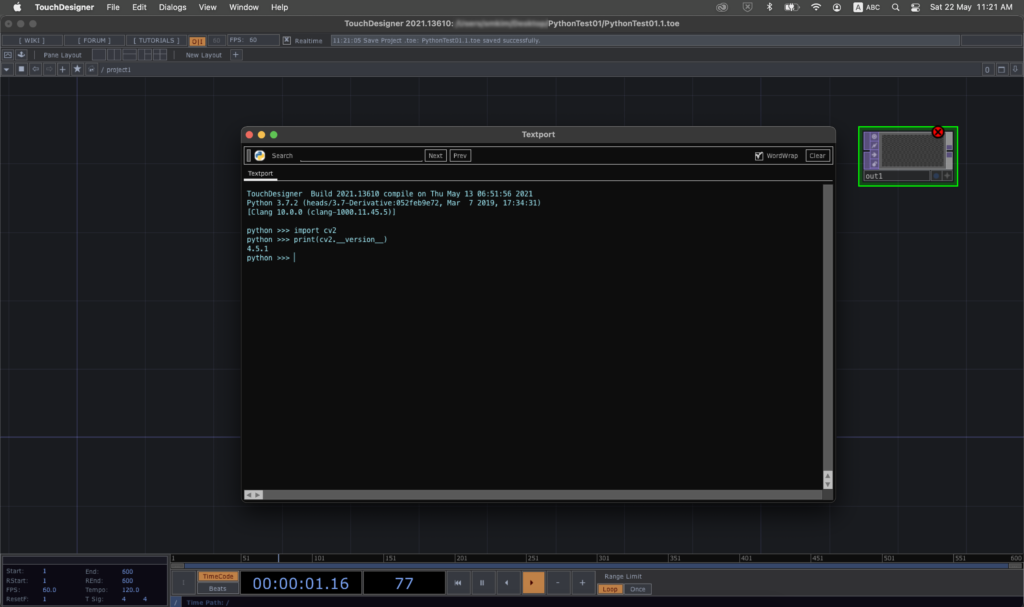
OpenCV

The next step is to customise the external libraries location from the Preferences menu. From the pull down menu, choose TouchDesigner – Preferences – General.
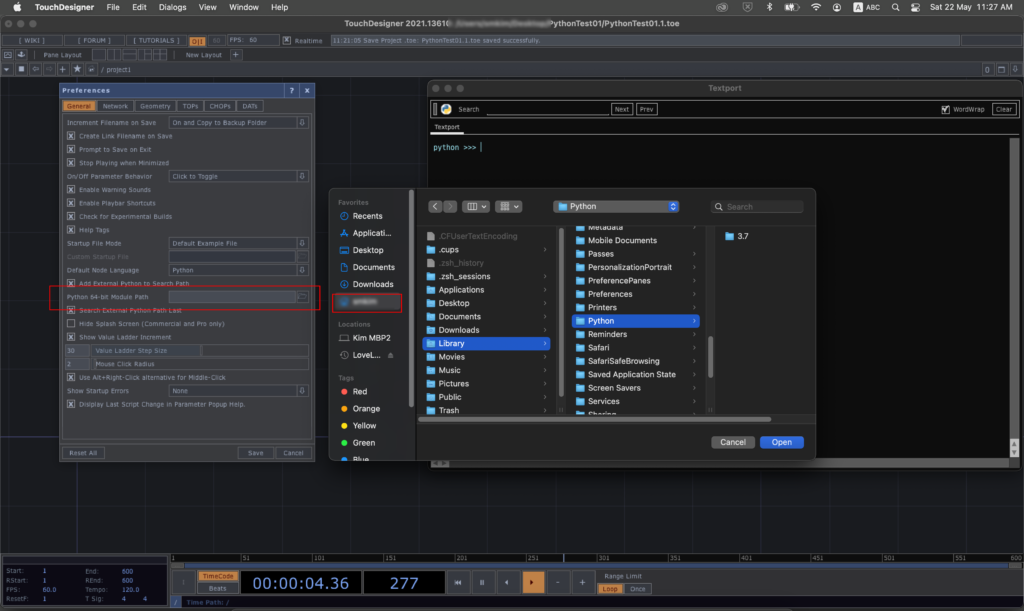
Preferences

Click the folder icon from the description, Python 64-bit Module Path. It will open up the file location dialog panel. Choose the home directory of your current user account. Since the Python libraries are installed inside the hidden Library folder, we need to type CMD SHIFT <period> to display all the hidden folders. Press the CMD, SHIFT and period “.” keys together. Choose the correct folder location as

Library/Python/3.7/lib/python/site-packages

and click Open.
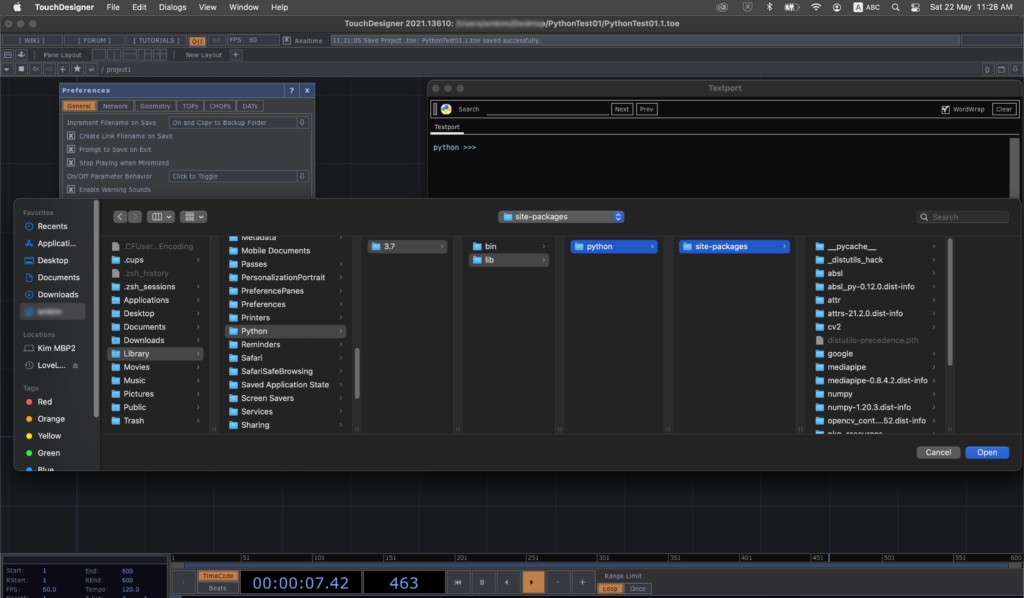
External modules folder

Click the Save button for the Preferences panel.
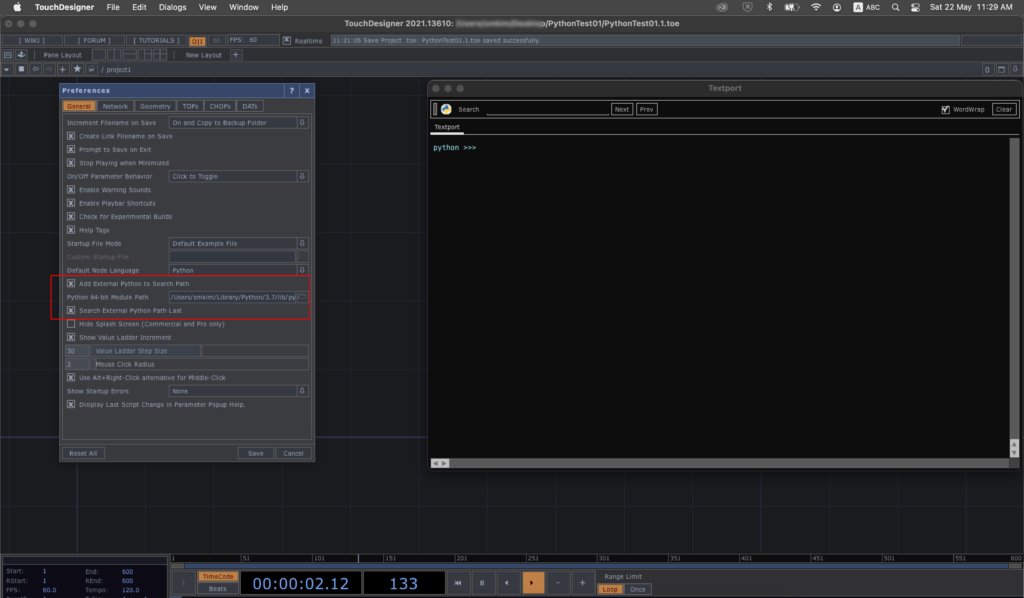
Save the Preferences

After we save the preferences, we can verify the installation of MediaPipe from the Textport panel by importing the mediapipe module and list out some of its components.

import mediapipe as mp
print(dir(mp.solutions))
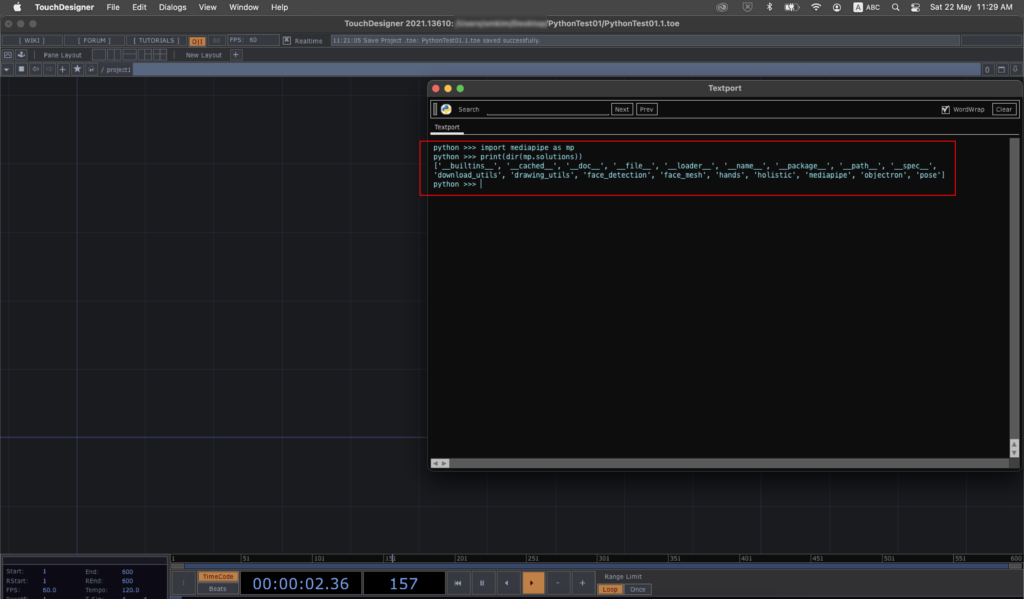
Verify the MediaPipe installation

We are now ready to play with the MediaPipe library in TouchDesigner. The first one will be the face detection facility in a Script TOP.

Searching in Weka with Processing

Further to the last Weka example, I used the same CSV data file for neighbourhood search. By pressing the mouse button, it generated a random sequence of numbers between 1 to 4. The program used the sequence as an instance to match against the database from the CSV data file. The closet match will be shown together with the distance between the test case (random) and the closet match from the database.

A sample screenshot

 
Source codes

import weka.core.converters.CSVLoader;
import weka.core.Instances;
import weka.core.DenseInstance;
import weka.core.Instance;
import weka.core.neighboursearch.LinearNNSearch;
import java.util.Enumeration;
import java.io.File;
 
Instances data;
String csv;
LinearNNSearch lnn;
boolean search;
int idx;
float dist;
String testCase;
String matchCase;
String distance;
 
void setup() {
  size(500, 500);
  csv = "Testing.csv";
  try {
    loadData();
    buildModel();
  } 
  catch (Exception e) {
    e.printStackTrace();
  }
  search = false;
  idx = -1;
  dist = 0.0;
  testCase = "";
  matchCase = "";
  distance = "";
  fill(255);
}
 
void draw() {
  background(0);
  if (search) {
    text(testCase, 100, 100);
    text(matchCase, 100, 150);
    text(distance, 100, 200);
  }
}
 
void loadData() throws Exception {
  // load external CSV data file, without header row.
  CSVLoader loader = new CSVLoader();
  loader.setNoHeaderRowPresent(true);
  loader.setSource(new File(dataPath(csv)));
  data = loader.getDataSet();
  data.setClassIndex(0);
 
  println("Attributes : " + data.numAttributes());
  println("Instances : " + data.numInstances());
  println("Name : " + data.classAttribute().toString());
 
  Enumeration all = data.enumerateInstances();
  while (all.hasMoreElements()) {
    Instance single = (Instance) all.nextElement();
    println("Instance : " + (int) single.classValue() + ": " + single.toString());
  }
}
 
void buildModel() throws Exception {
  // Build linear search model.
  lnn = new LinearNNSearch(data);
  println("Model built ...");
}
 
void test() throws Exception {
  // Construct a test case and do a linear searching.
  double [] val = new double[data.numAttributes()];
  val[0] = 0;
  testCase  = "Test case:  ";
  matchCase = "Match case: ";
  distance  = "Distance:   ";
  for (int i=1; i<val.length; i++) {
    val[i] = floor(random(4))+1;
    testCase += (nf((float)val[i]) + ",");
  }
  testCase = testCase.substring(0, testCase.length()-1);
  DenseInstance x = new DenseInstance(1.0, val);
  x.setDataset(data);
  Instance c = lnn.nearestNeighbour(x);
  double [] tmp = lnn.getDistances();
  dist = (float) tmp[0];
  idx = (int) c.classValue();
  matchCase += data.instance(idx).toString();
  distance += nf(dist);
  saveFrame("weka####.png");
}
 
void mousePressed() {
  try {
    test();
  } 
  catch (Exception e) {
    e.printStackTrace();
  }
  search = true;
}

First trial of Weka in Processing

Instead of using the machine learning module (ML) of OpenCV, I also investigated another popular machine learning library for Java, Weka, from the University of Waikato. The first trial was to load an external CSV file into the proper data structure of the Weka library. The content of the CSV file is as follows. The first column will be the index of the records.

A,1,2,3,4
B,2,3,4,1
C,3,4,1,2
D,4,1,2,3
E,4,3,2,1

The first thing to do was to download the latest Weka distribution, currently 3.8 and placed the weka.jar file into the code folder of the Processing sketch.

The complete codes

import weka.core.converters.CSVLoader;
import weka.core.Instances;
import weka.core.Instance;
import java.util.Enumeration;
import java.io.File;
 
Instances data;
// Name of the CSV data file
String csv;
 
void setup() {
  size(600, 600);
  csv = "Testing.csv";
  try {
    loadData();
  } 
  catch (Exception e) {
    e.printStackTrace();
  }
  noLoop();
}
 
void draw() {
  background(0);
}
 
void loadData() throws Exception {
  CSVLoader loader = new CSVLoader();
  loader.setNoHeaderRowPresent(true);
  loader.setSource(new File(dataPath(csv)));
  data = loader.getDataSet();
  data.setClassIndex(0);
 
  println("Attributes : " + data.numAttributes());
  println("Instances : " + data.numInstances());
  println("Name : " + data.classAttribute().toString());
  // To scan through all the records of the CSV file
  Enumeration all = data.enumerateInstances();
  while (all.hasMoreElements()) {
    Instance rec = (Instance) all.nextElement();
    println("Instance : " + rec.classValue() + ": " + rec.toString());
  }
}

The console output

Attributes : 5
Instances : 5
Name : @attribute att1 {A,B,C,D,E}
Instance : 0.0: A,1,2,3,4
Instance : 1.0: B,2,3,4,1
Instance : 2.0: C,3,4,1,2
Instance : 3.0: D,4,1,2,3
Instance : 4.0: E,4,3,2,1